- Published on
How I Started and Published my professional website in a day with less than 10$
- Authors

- Name
- Mohamed Hegab
- X
- @mohamedhegab92
- Why Creating my own website?
- My tools for creating the website
- Why Gatsby?
- Why Netlify?
- What are the steps?
- Conclusion
Why Creating my own website?
- I wanted to create my website so as to have an online presence.
- It will help me in my career as it is a very powerful marketing tool for me.
- I wanted to start my writing career which I know will have a huge impact on others and myself as everyone has to teach others and share his knowledge with others. as sharing knowledge has mutual benefits for both of us.
My tools for creating the website
- Starting a new website we have a lot of choices scaling from creating everything from scratch to everything is ready except your data.
- But there is always a tradeoff depending on your needs.
- I decided to start from the middle ground as I have a ready template code written in React and Gatsby framework.
- Netlify to deploy the code
- Google Analytics to track my page views
- GoDaddy For buying the domain
Why Gatsby?
- So I can edit everything and adapt everything to the business logic I want.
- Gatsby starters have a lot of templates to choose from a lot of templates.
- Structure the application.
- Adding features and content as I need with the way I needed.
- Integrating with any 3rd party.
- Calling an API that will help me to implement any workflow.
Why Netlify?
- Simplicity
- Very easy CI/CD (Continuous Integration / Continuous Development) with Github
- Generate the HTTPS certificate for free
- Adding my custom domain for free
What are the steps?
1. Prepare your Environment
Install nvm
From the nvm installation instructions, we install nvm like so
curl -o- https://raw.githubusercontent.com/nvm-sh/nvm/v0.38.0/install.sh | bash
When that completes, open a new terminal and run
nvm --version
If it returns a version number, you’ve succeeded and can move on to installing node/npm.
However, if you instead see this:
zsh: command not found: nvm
then try these suggestions:
Open ~/.zshrc and add this to the bottom:
[[ -s $HOME/.nvm/nvm.sh ]] && . $HOME/.nvm/nvm.sh # This loads NVM
Open a new terminal and try running nvm --version again. Hopefully, it works. If it doesn’t check out the troubleshooting tips here.
Use nvm to install node/npm
To install node, simply run
nvm install node
To confirm it worked, run node --version — if you see a version number, you’re in business!
Note that npm --version should also now succeed.
Use npm to install yarn
To install yarn, simply run
npm install --global yarn
Use npm to install npx.
Since NPX is also a Node package we can use NPM to install or update it:
npm install -g npx
2. Choosing Gatsby starter
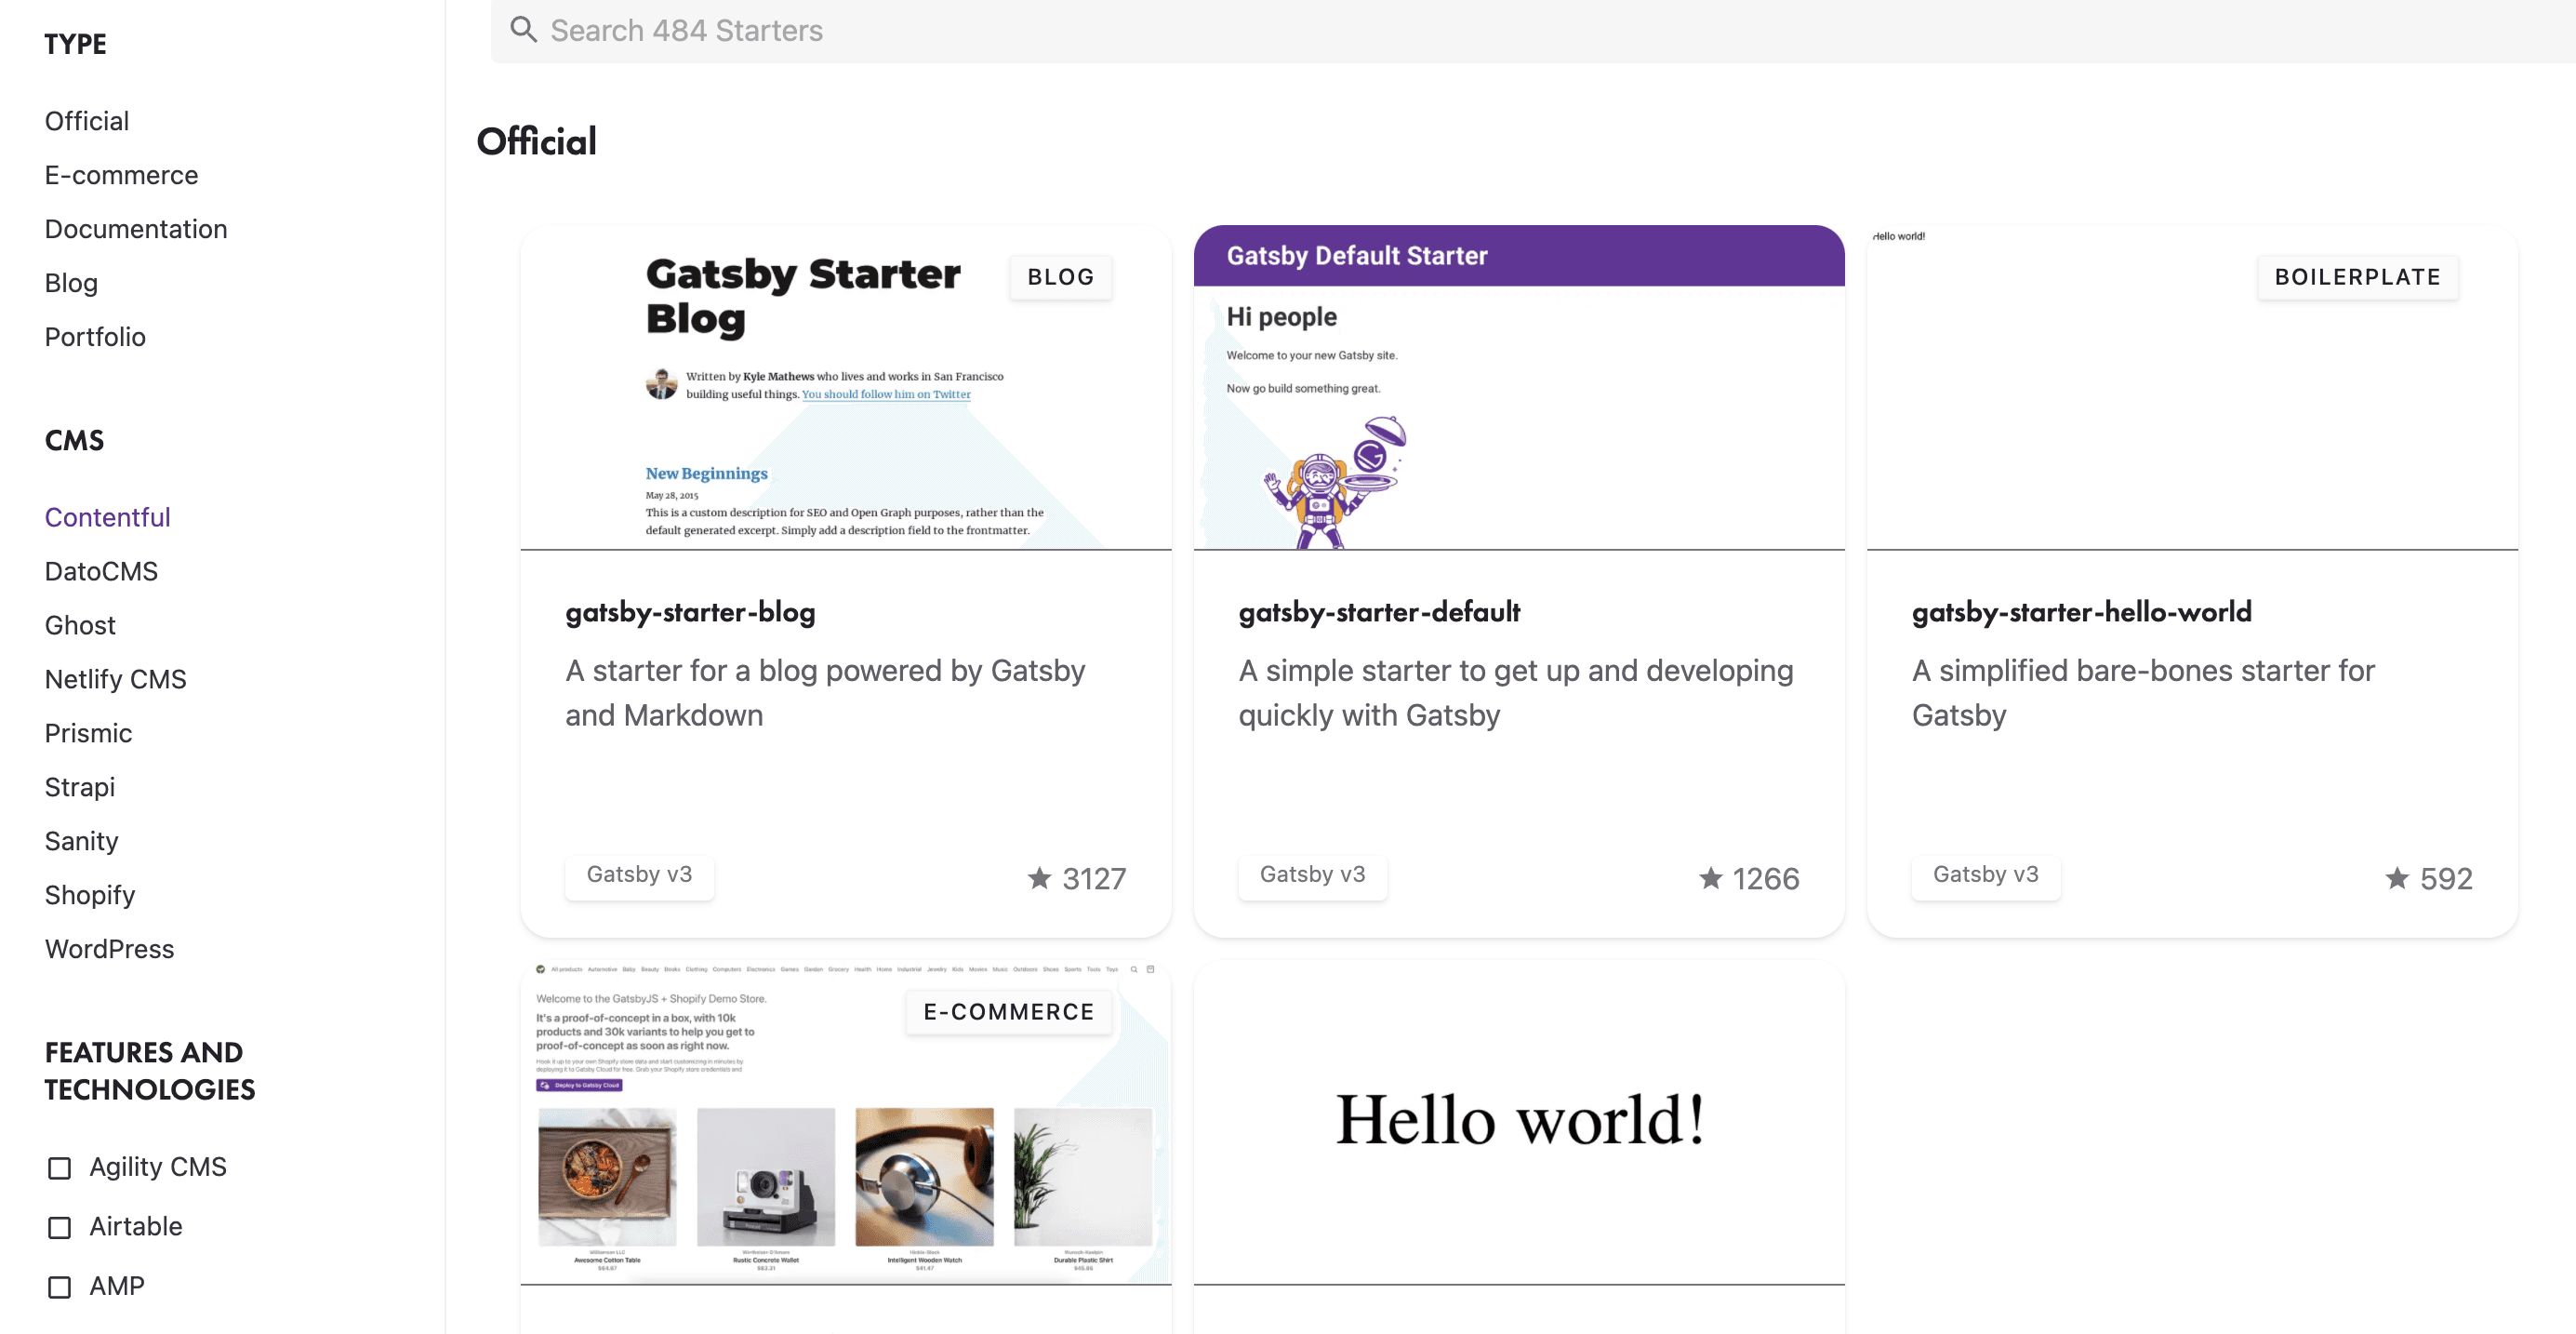
- I've chosen a starter that has TailwindCSS with
SEOalready implemented and Typescript technologies. - Copy the command to run on your device
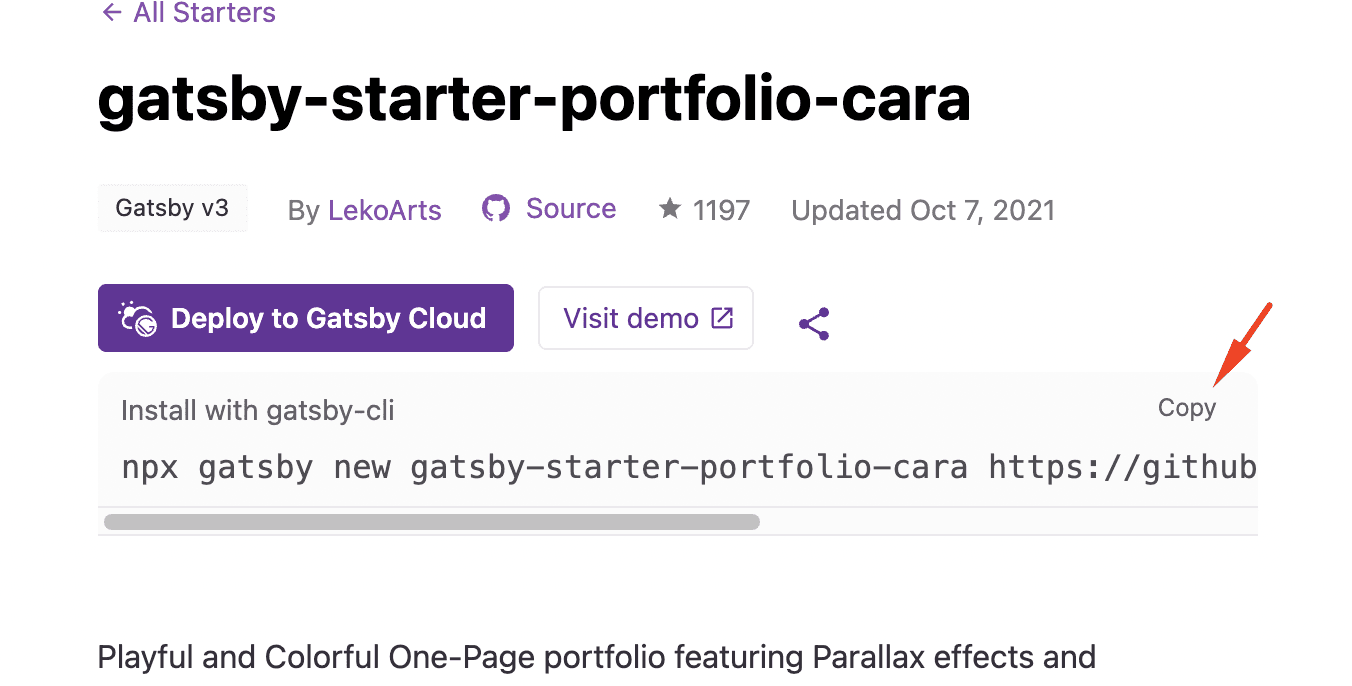
npx <your repo name> <template git url>
- run it on the machine, It will take several minutes and then everything will be ready for you.
3. Create Github repository
- Create the Github repo and then link it with your application
git remote add origin <your github url>
4. Connecting to Netlify
Step 1: Add Your New Site
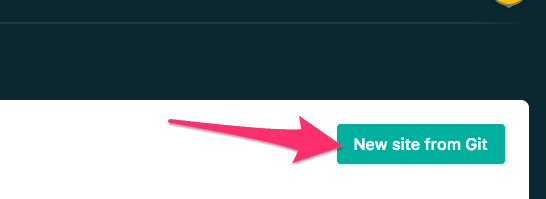
Once you’ve logged in, click the New site from Git button on your dashboard.
Step 2: Link to Your Repository
Clicking the button brings you to this screen where you connect Netlify to your Git repository. Select the service you use.
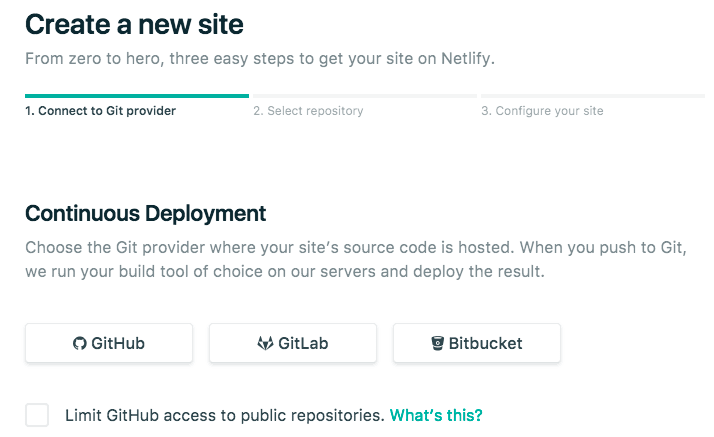
When you push to GitHub, Gitlab, or Bitbucket, Netlify does all the work for you, meaning no more manual deploying of updates or changes!
Step 3: Authorize Netlify
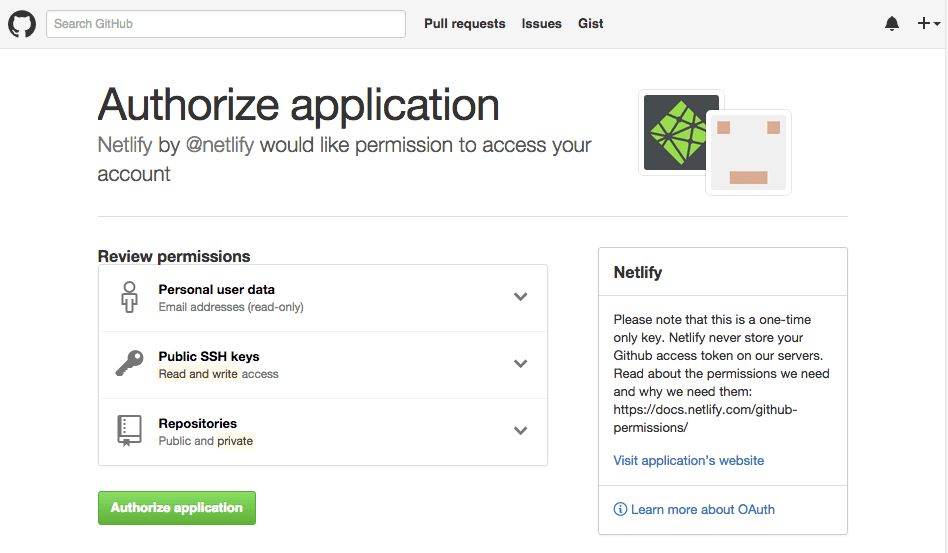
Click the Authorize Application button to allow Netlify and GitHub to talk to each other. Netlify doesn’t store your GitHub access token on our servers. If you’d like to know more about the permissions Netlify requests and why we need them, you can read our doc on GitHub permissions.
Step 4: Choose Your Repo
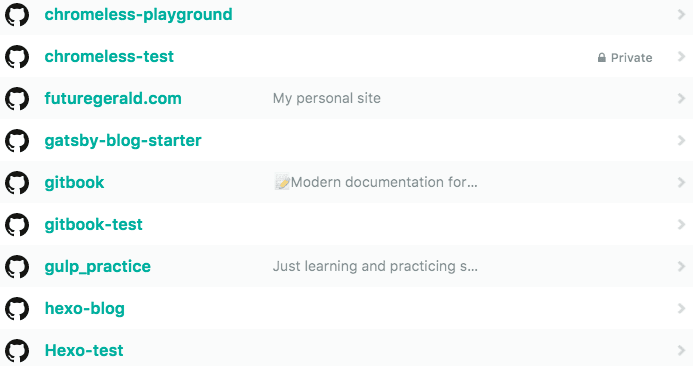
Now that you’ve connected Netlify and GitHub, you see a list of your Git repositories. Select the one you created earlier.
Step 5: Configure Your Settings
Here you configure your options. For this tutorial, the defaults are what you need, so click Deploy site.
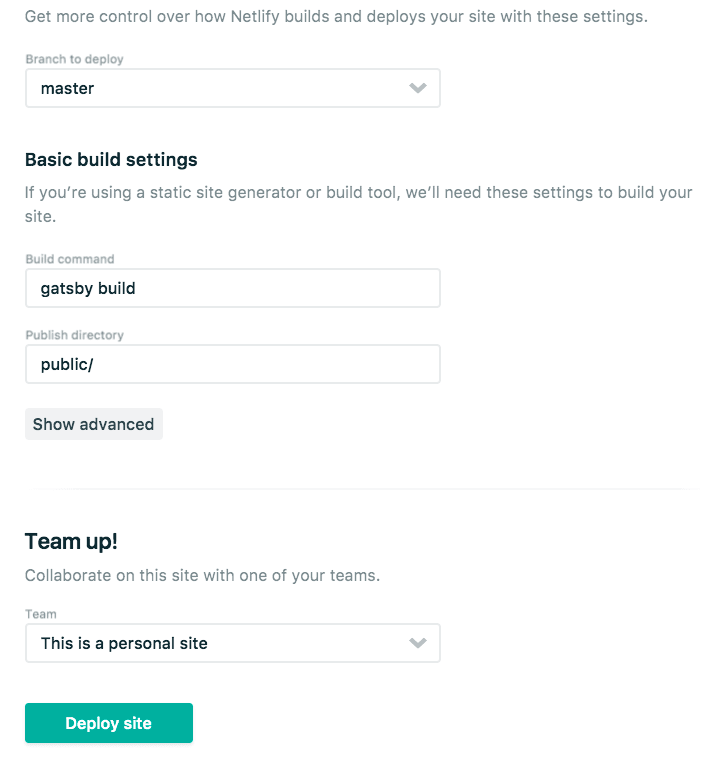
Step 6: Build Your Site
Now it’s time to sit back and relax, grab something cold to drink, scratch the dog behind the ears, or get up and walk around. (You’ve probably been in front of the computer for too long today, right?) Netlify does the rest, and you can watch the progress.
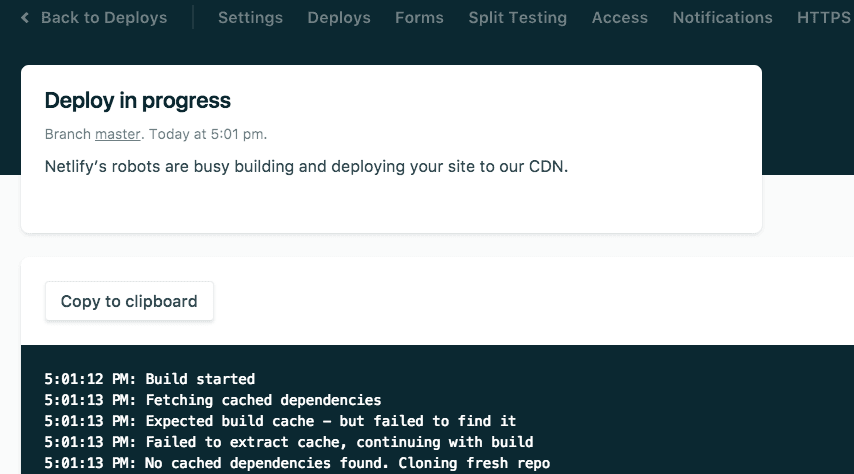
Step 7: Make changes
When you make changes to your site they are automatically reflected locally, but what about on the Netlify hosted version? Every time you commit and push changes to GitHub, it triggers a new build on Netlify, and as soon as the build finishes, your changes are also live on the internet.
5. Buy the domain from Godaddy
- Search for the domain name and pay for it you can follow this guide for purchasing your domain.
6. Link the domain with Netlify
- You can follow this guide for linking Netlify with the GoDaddy domain.
Conclusion
- Now after following all those steps you have your website deployed with a budget of less than 10$ which is only the domain you have bought from Godaddy.
- Don't forget to update your Linkedin or Twitter and your CV so that people know you have a website 🤩.